A new Rankin dinghy
by Owen O’Connell
In early February, 2021, Dave O’Keeffe and Owen O’Connell set out to build a new Rankin, the first in 24 years, and only the second (Dave built himself a Rankin in 1997) since the close of the Rankin workshop in the late 1980s. This was made possible because Dave had purchased the Rankin boat mould when the workshop closed, and of course, he had the skills needed for building a boat.
In this blog post, significant milestones along the way are highlighted.
February 9, 2021
![]()
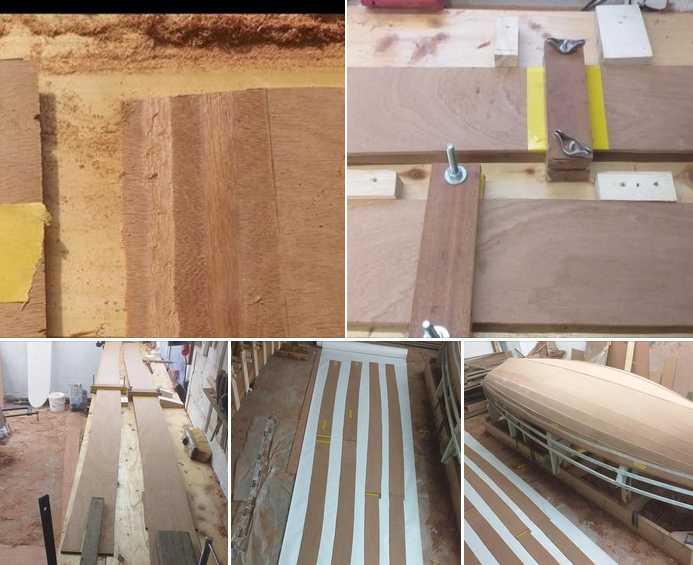
Transom knee made up using a template on our new router table.
February 11, 2021
![]()
Transom and Transom Stiffner made up using a 9mm plywood template
February 15, 2021
![]()
Transom glued up and rough shaped
February 16, 2021
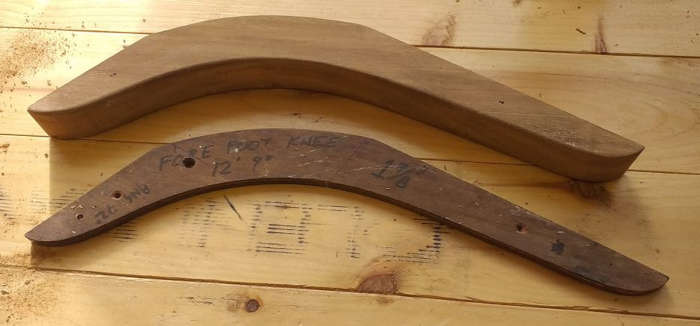
Fore foot cut from 1 7/8 inch thick Iroko using original Rankin template.
February 16, 2021
We screwed and glued all the centreline timbers (transom, transom knee, hog, fore foot and apron) over the Rankin mould / jig. The mould is the original mould that was built by Eric Rankin and used by himself and his brother David from the early 1960’s to the late 1980’s. Dave O’Keeffe purchased the mould when the contents of the Rankin workshop at Lynch’s Quay were sold off and has had it in safe keeping every since.
February 17, 2021
Fairing the apron to the mould and to accept the future planking.
February 18, 2021
Today we made up a template to match the sheer line of the mould, this will then be matched against an existing Rankin dinghy and then used to cut the curve for a new “dinosaur”!
February 19, 2021
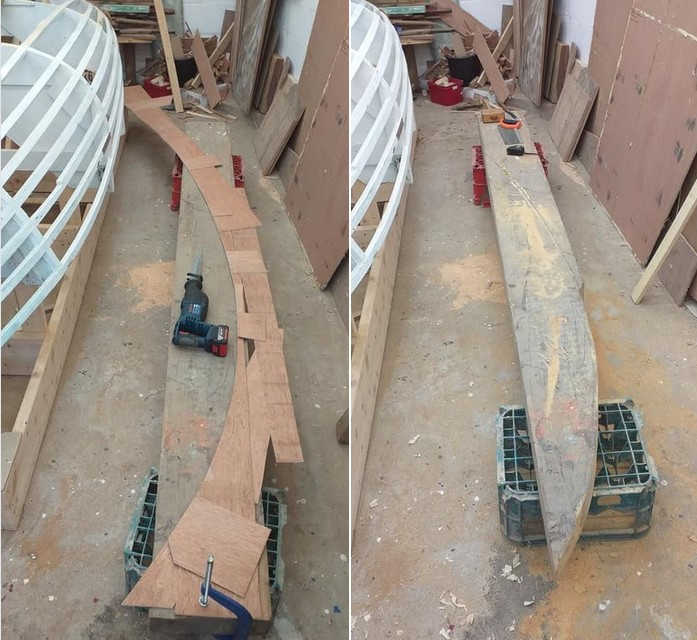
Having faired the template to match the inside curve of the gunwale, we laid it out on a large slab of pitch pine 11’ long x 14” wide x 4 1/2” thick and started to cut.
February 20, 2021
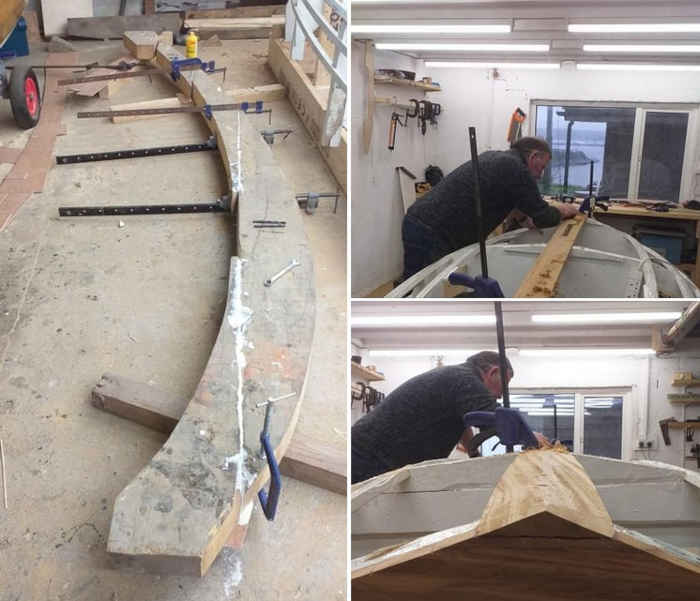
The “Dinosaur” being glued and clamped and fixed with coach bolts and 150mm long screws, meanwhile Dave started fairing the hog and transom to recieve the garboard planks.
February 22, 2021
The “Dinosaur” now cleaned down and in its upright position with floor brackets fitted, the angle blocks still need to be secured. The curved face has been faired with electric plane, then block plane and finished off with the sander.
February 24, 2021
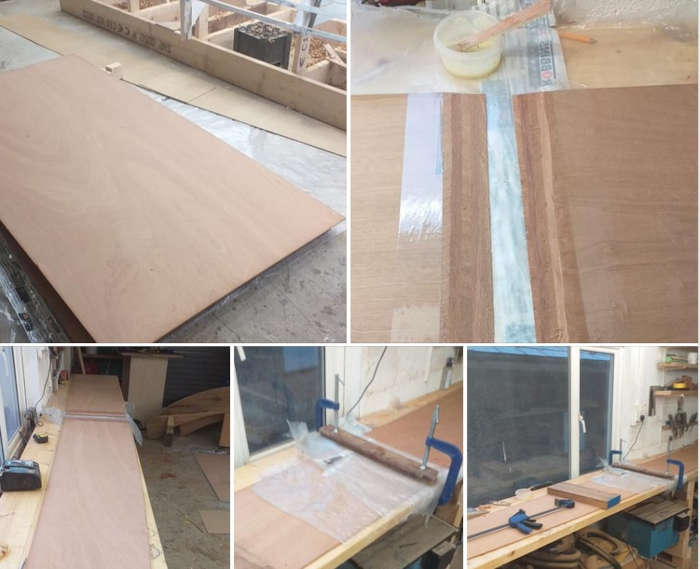
Drawing down the 1st of 6 sheets of 6mm ply (Robins Super Elite Plus) for cutting using the garboard template. Then scarfing the fore and aft sections of the plank together. The plastic is used to resist the glue and keep the timber clean.
February 24, 2021

Final fairing on the Hog ,Forefoot and Apron with a dry run on the bendy bit of the Garboard, to check the lands.
February 25, 2021
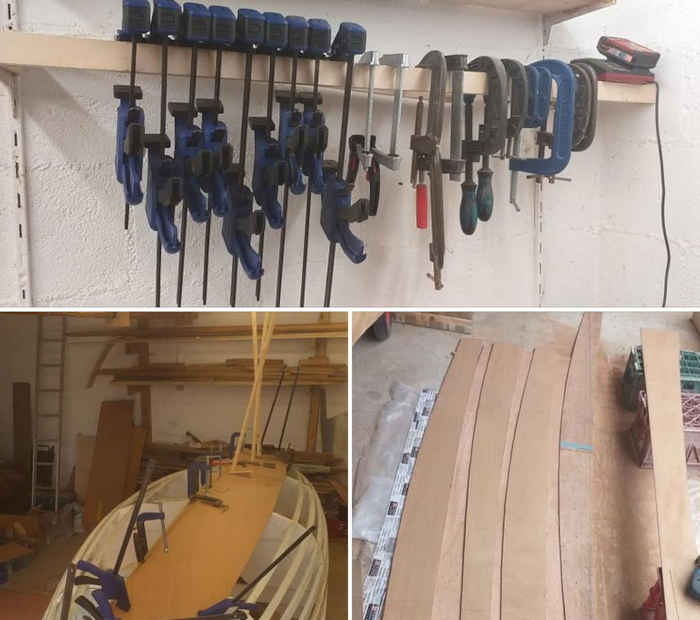
More clamps arrived today, meanwhile we dry fitted the starboard garboard, scarfed and glued the port garboard and cut out the next set of planks
February 26, 2021
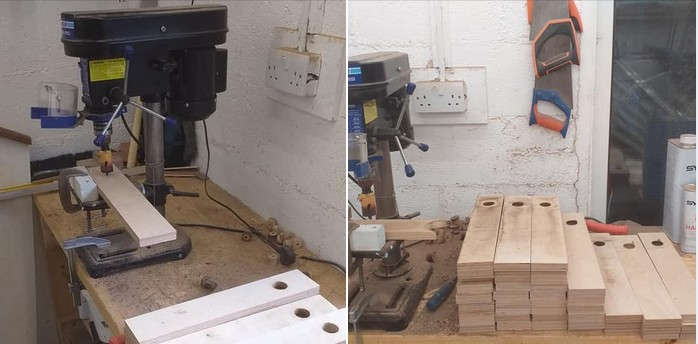
Drilling a 30mm dia hole in in each of the 44 number 400 x 60 x 25 mm thick pieces of plywood, which will form the spikes on the back of the Dinosaur. The newly arrived Epoxy delivery ready for glueing up the planking.
February 28, 2021
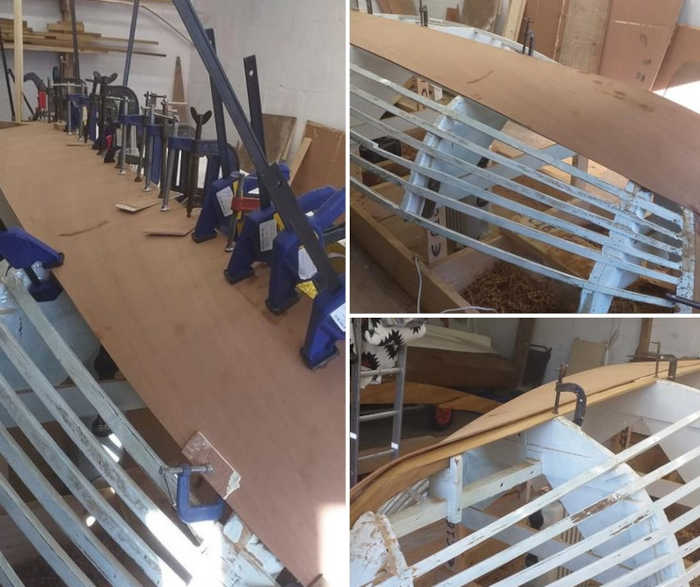
Finally we got the 1st garboard plank glued up and clamped on the mould yesterday; clamps and tape removed today. Only 13 more to go!!
March 1, 2021

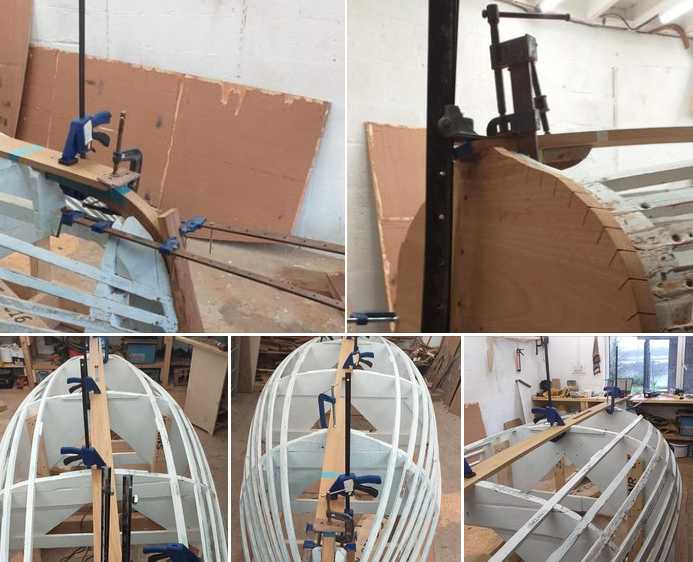
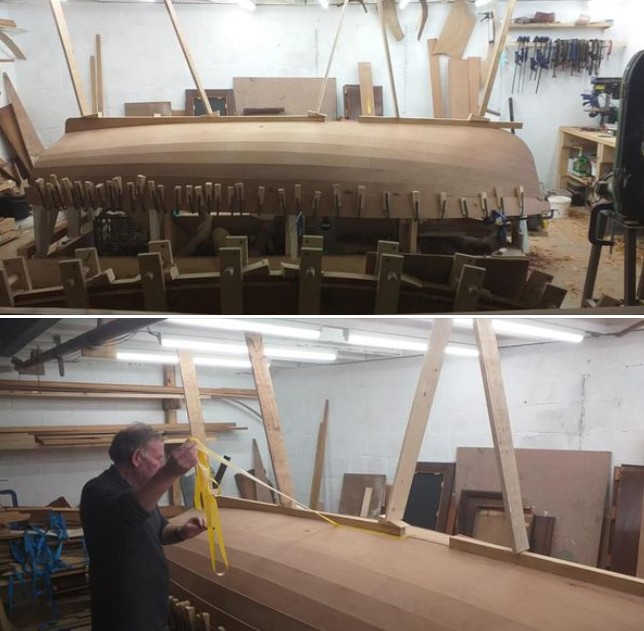
Dry run using ratchet straps to hold down the 2nd Garboard, screws and blocks did not prove man enough at the turn of the Garboard around the Forefoot. Time was also spent setting up the spikes on the”Dinosaur”.
March 4, 2021
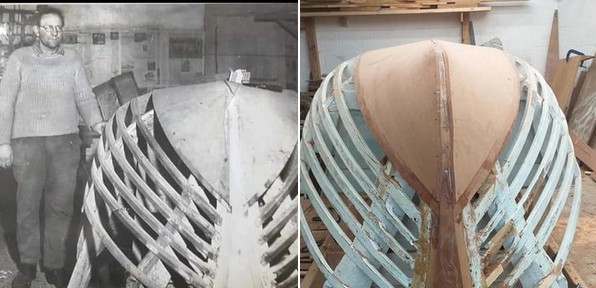
60 years on and some things never change.
March 4, 2021
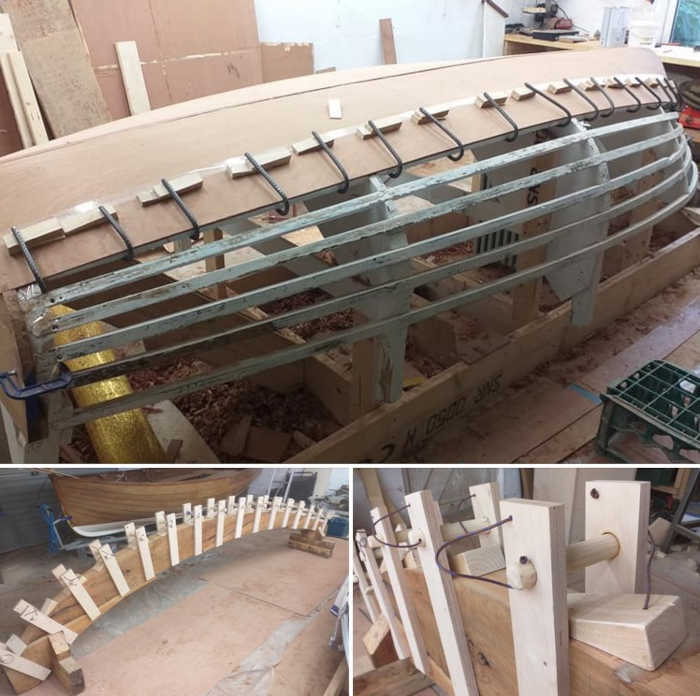
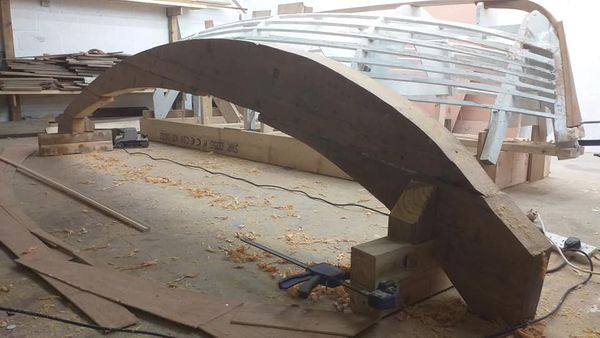
The 3rd plank glued and clamped today, using U shaped rebar and wooden wedges. The “Dinosaur” nearing completion, this will be used to bend the gunnels when the time comes.
March 5, 2021
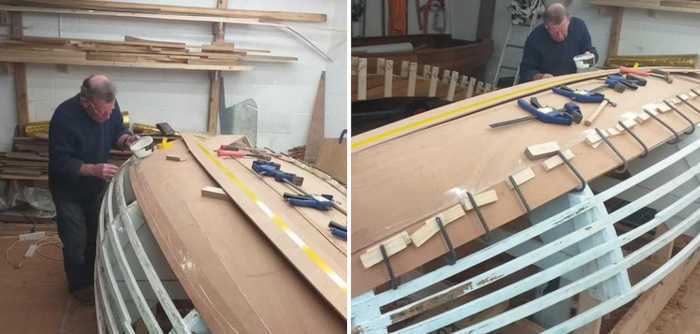
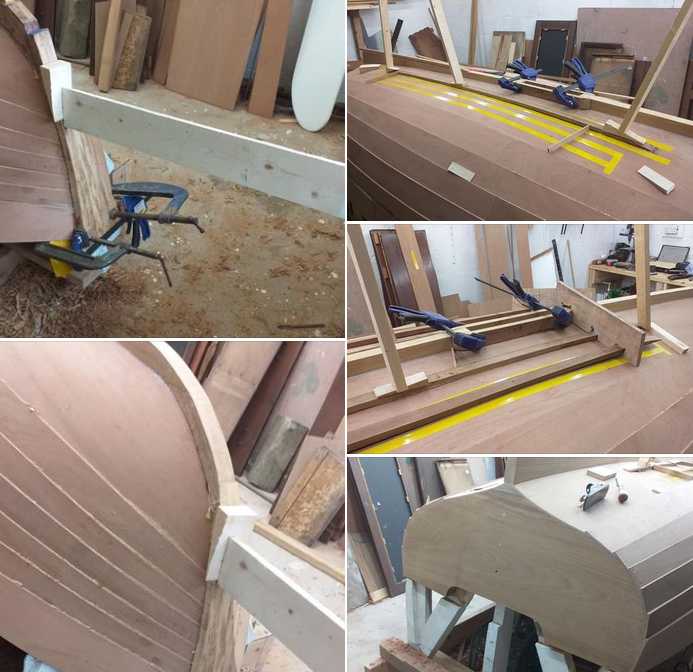
4th plank on, glued and clamped. Dave applying glue to the land of the 5th plank, the yellow tape on the reverse of the plank is to protect against glue squeeze out.
March 10, 2021
Checking the fairing on the bottom of the 5th plank by setting up stations at every 100mm on the 4th plank of the existing Rankin and recording the visible width. Then transfering that information on to the new 4th plank and marking the bottom edge of the rough cut 5th plank. Dave then fairs to this line. Planks 8 and 9 were fitted today.
March 11, 2021
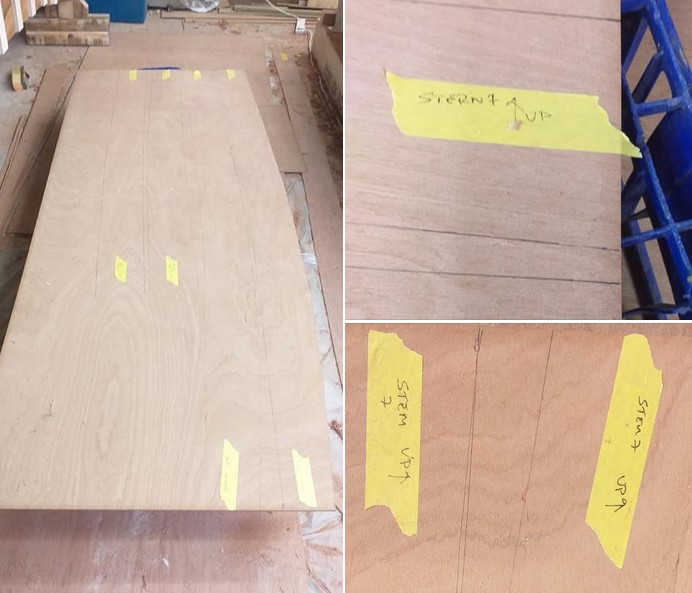
Today was cutting out planks 13 & 14; yes the last ones (also known as the “Whiskey” plank) The planks are cut using the templates we previously made. They are cut 6mm over size to allow for any change in the lay of the plank as it is bent on the mould. Plank 10 was fixed today as well as gluing up the scarfs on planks 11 & 12.
March 14, 2021
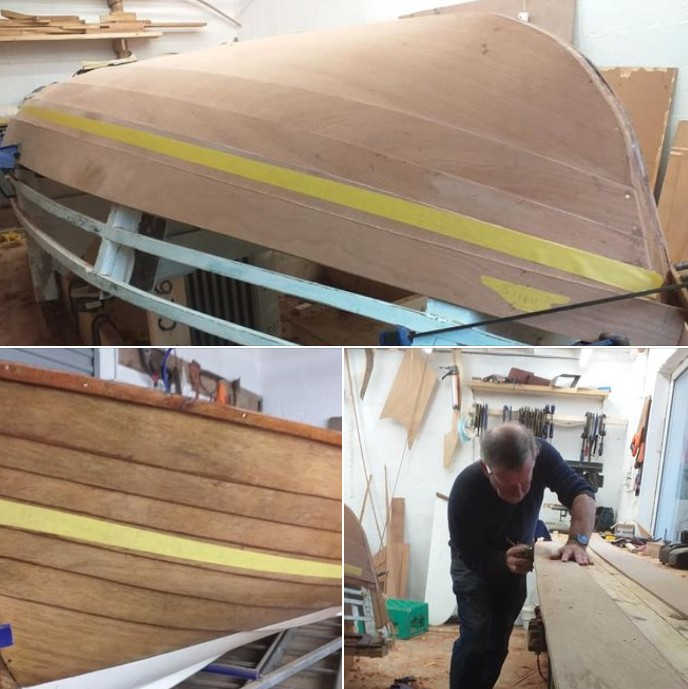
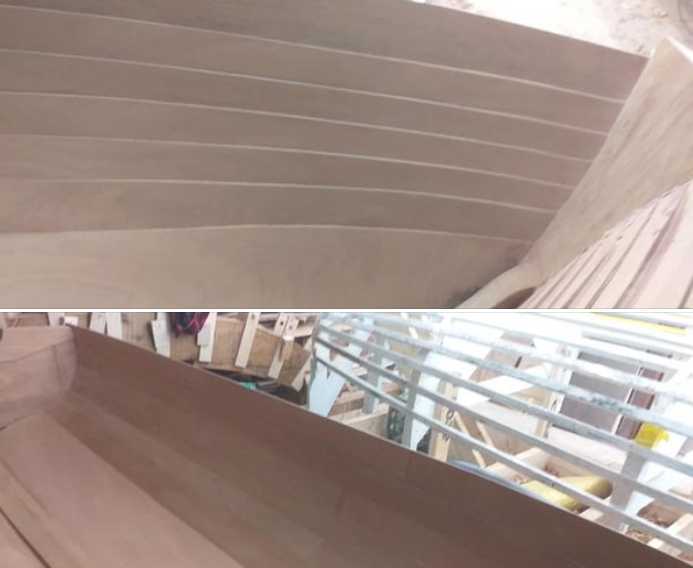
Each plank in made from near enough a sheet and a half length of ply, a scarf (scarph) joint is made to connect the two pieces, the plywood being 6 mm thick means the scarf is 54mm wide ( a 1 in 9 slope). The joint is glued and clamped. The finished product shows the “S” shape of the top 2 sets of planks on the Rankin - there’s more to planks than meets the eye.
March 15, 2021
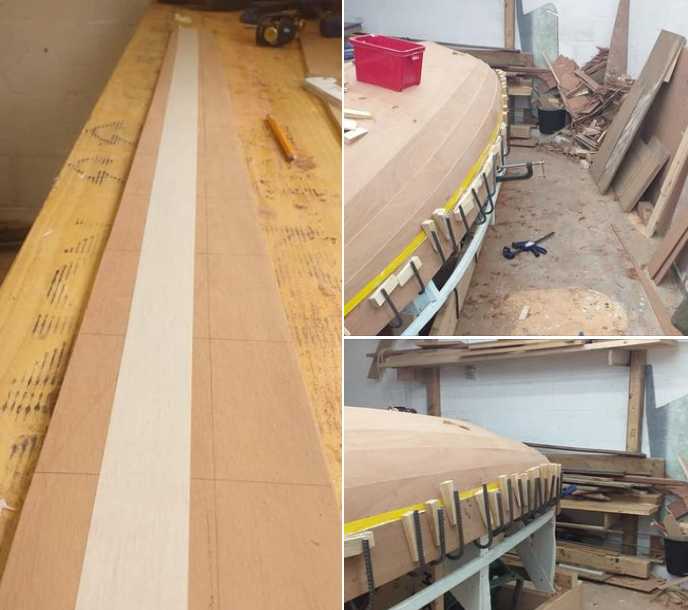
Working on the 11th plank, following the final dry fit, a datum line is drawn the length of the plank. The width of the plank is measured either side of this datum every 100mm along the length of the plank. This information will be used to produce CNC planks in the future (the tape is to record the values while keeping the plank clean) The plank is then glued and clamped, lots of clamps were used in fixing this plank so not enough clamps to do plank 12 today.
March 22, 2021
Plank 14 (the Whiskey plank) fitted this morning. No time to celebrate 🍺 as we are moving on to fit the keel this afternoon.
March 23, 2021
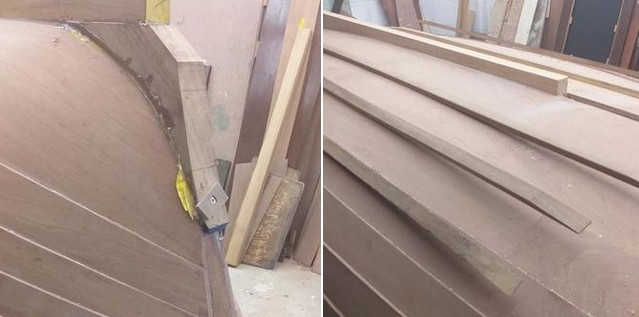
Dave fitted the deadwood which was scribed to the shape of the hull and glued on above the keel and below the future apron. Meanwhile I opened out the slot for the daggerboard and made up the running boards out of 27 x 17mm strips of Iroko.
March 23, 2021
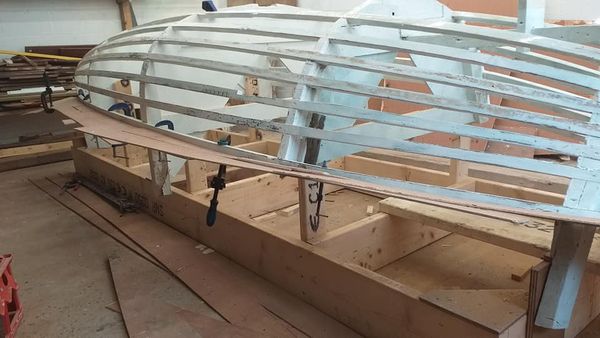
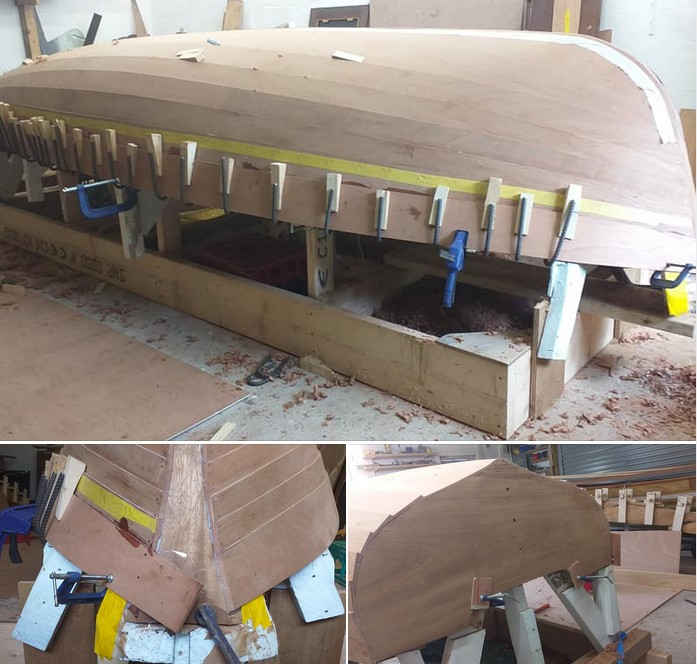
The Keel was shaped, fitted, glued and braced from the ceiling. It was made from a piece of 10ft long, 120mm x 40mm Iroko. The gap in the middle is for the dagger board slot. Cheek pieces will be added after the slot is cut to final dimensions.
March 24, 2021
Several workfaces today.
- The apron was rough shaped, glued and braced in place.
- The front end of the keel and the deadwood started to be shaped.
- The cheeks of the daggerboard box were shaped, glued and clamped in place.
- The first of the running boards was glued and braced in place ( this proved problematic so a jig was made up to hold them in place for when we glue them tomorrow).
- Completed trimming and fairing the planks at the transom.
March 25, 2021
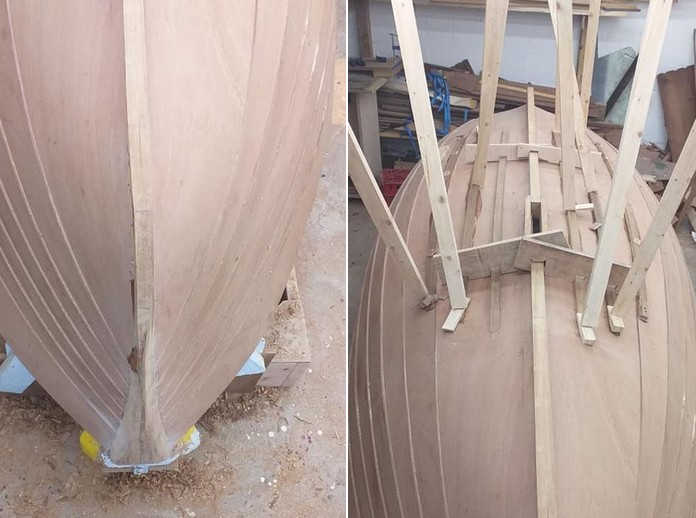
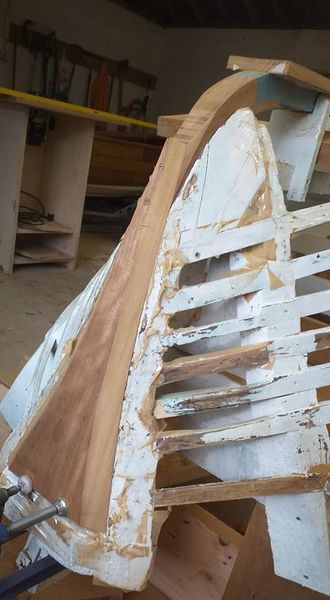
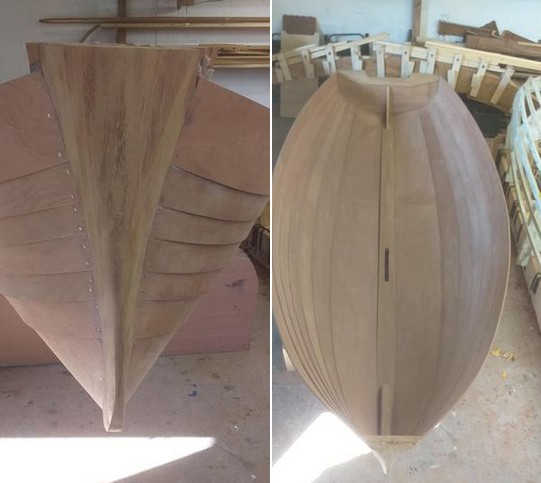
A forest of braces holding down the running boards while 2 sets of jigs hold then in place.The signature Rankin shape of the stem can be seen as Dave continued to shape the apron.
March 26, 2021
Turned the right way up today. R to L: mould, new shell, finished product.
March 28, 2021
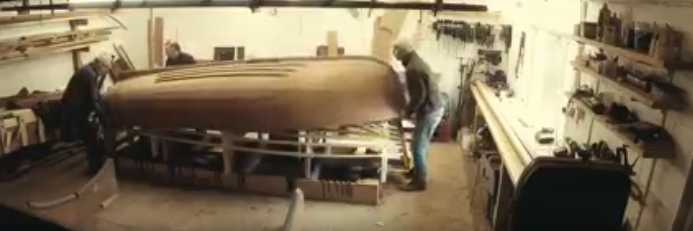
61 years after the 1st Rankin came off this very same mould a new Rankin is born. Many thanks to Bud for providing the workshop space to carry out this very special project.
March 30, 2021
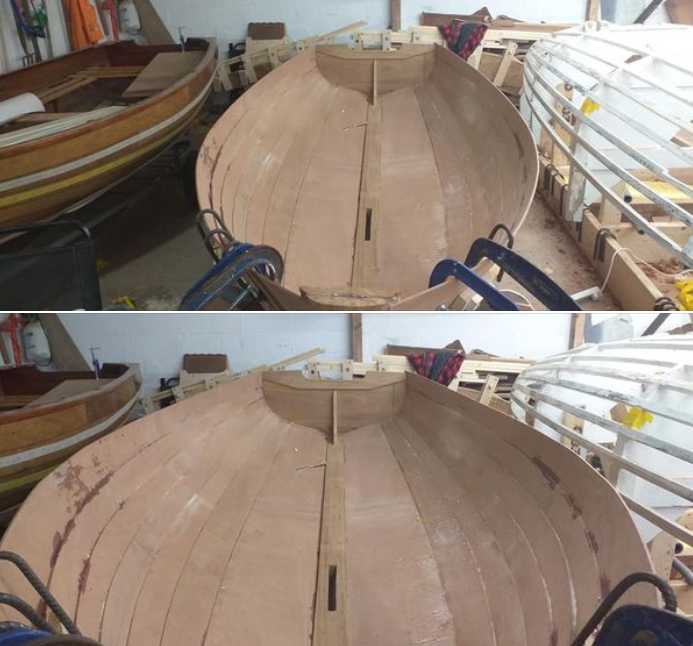
After the excitement of turning the boat the boring task of cleaning the glue lines progresses.
April 2, 2021
Glue lines and glue stains cleaned off the shell, next stage is to make the templates and jig for the install of the twarths and stern seat assembly as advised by Mike O Sullivan (who spent his misspent youth in the Rankin Workshop).
April 6, 2021
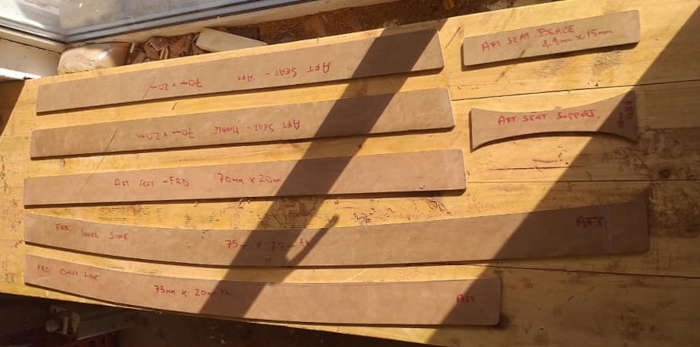
New block plane and spokeshave eased the work involved in making the templates for the aft seat assembly.
April 14, 2021
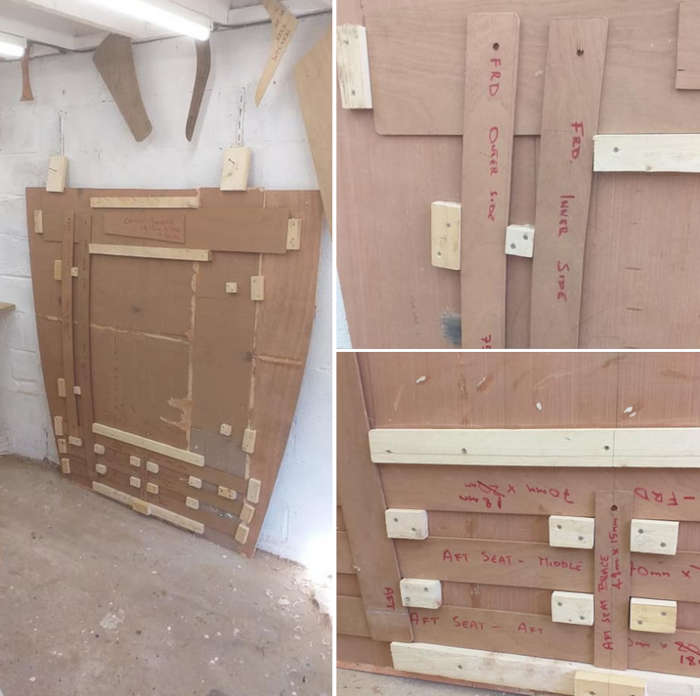
Templates and jigs, the new seat assembly jig completed and on the wall with the rest of the Rankin templates.
April 15, 2021
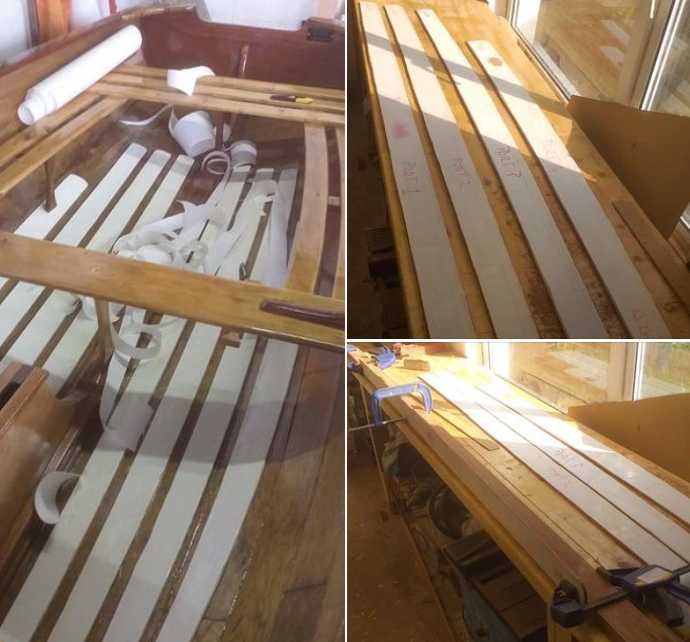
Making templates for the bottom (floor)boards, used heavy guage paper fixed over the boards of the existing Rankin using Prit Stick and then cut around the boards with a scissors to make the templates. The templates were then peeled off and laid on a sheet of ply, marked and cut out with a jigsaw. Final fairing done with a block plane.
… continued in part 2 🔗